Practical MySQL Replication and Scalability - Part 3: Moving to GTID-Based Replication
Part 3 moves the replication topology from manual file-position coordination to GTID-based auto-positioning.
If you have ever had to rebuild a replica under pressure, you already know the weakness of classic binlog coordinates: they work, but they add manual bookkeeping exactly when you want the process to be simpler. GTID reduces that operational burden.
What GTID Changes
A GTID is a globally unique identifier attached to each committed transaction. Instead of asking a replica to start at a specific binary log byte offset, you ask it to continue from the transactions it has not yet executed.
Conceptually:
GTID = source_uuid:transaction_id
That means the replica can synchronize based on transaction history rather than a human-tracked log coordinate.
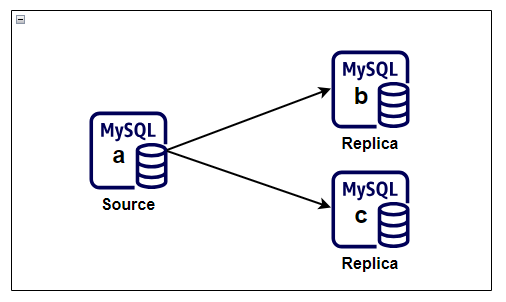
In this GTID phase, the topology still uses one source and two replicas. The change is not the shape of the environment, but the way replicas determine where to resume replication.
Enable GTID on the Source
The source must be started with GTID support enabled.
Example configuration:
[mysqld]
log-bin=mysql-bin
log-bin-index=mysql-bin.index
server-id=1
binlog-format=ROW
innodb_flush_log_at_trx_commit=1
sync-binlog=1
gtid_mode=ON
enforce_gtid_consistency=ON
enforce_gtid_consistency=ON prevents statements that would break GTID-safe replication semantics.
Enable GTID on the Replicas
Each replica needs the same GTID-related settings, along with its existing relay log configuration.
Example:
[mysqld]
server-id=2
relay-log=relay-mysql-b
relay-log-index=relay-mysql-b.index
skip-slave-start
gtid_mode=ON
enforce_gtid_consistency=ON
Repeat the same pattern on additional replicas, changing only the server-specific identifiers and relay log names.
Verify GTID Settings After Restart
After restarting MySQL on each server, confirm that the required variables are active.
SHOW VARIABLES LIKE 'gtid_mode';
SHOW VARIABLES LIKE 'enforce_gtid_consistency';
You want both variables to report ON.
Reconfigure the Replica to Use Auto-Positioning
Once GTID is enabled, change the replication source configuration to use transaction auto-positioning.
Example:
CHANGE REPLICATION SOURCE TO
  SOURCE_HOST='10.0.0.10',
  SOURCE_USER='replication_user',
  SOURCE_PASSWORD='<strong-password>',
  SOURCE_AUTO_POSITION=1,
  GET_SOURCE_PUBLIC_KEY=1;
Then start replication:
START REPLICA;
SHOW REPLICA STATUS\G
What to Look for in Replica Status
When the replica is healthy, these signals matter most:
Replica_IO_Running: YesReplica_SQL_Running: YesAuto_Position: 1Seconds_Behind_Source: 0or near zero
You can also inspect the GTID tracking fields:
Retrieved_Gtid_SetExecuted_Gtid_Set
These fields become especially useful when troubleshooting lag, reparenting, or partial recovery.
Why GTID Is Usually Better
GTID-based replication is not magically simpler in every edge case, but it is much easier to operate day to day.
Main advantages:
- No need to manually capture log file and position during every reprovision
- Easier replica rebuilds and source changes
- Better fit for automated failover or topology management tools
- Clearer transaction history tracking across servers
Functional Validation
Once GTID replication is online, validate it the same way you validated binlog-based replication.
Example:
CREATE DATABASE db4;
CREATE DATABASE db5;
Then confirm those changes appear on every replica.
If the databases arrive cleanly and SHOW REPLICA STATUS\G remains healthy, the topology is working under GTID.
In Part 4, I extend the discussion from replication into scalability by using the clone plugin and chained replication to build out additional capacity more efficiently.